More than a year ago, Joomla! 4 was released, the latest major version in the Joomla! universe. For agency owners and freelancers, such a major update is always associated with a "migration marathon" to update all client projects and their own websites to the latest version. Reason enough to summarise our experiences from everyday agency life in a small guide.
Unlike an update within the version number, i.e. a patch or minor update, backward breaking changes are permitted for a major update in the sense of semantic versioning (https://semver.org). This means that a client project should be migrated and then tested in a secure test environment before it is uploaded back into the live system. This way, the system can be tested in detail and any incompatibilities can be eliminated.
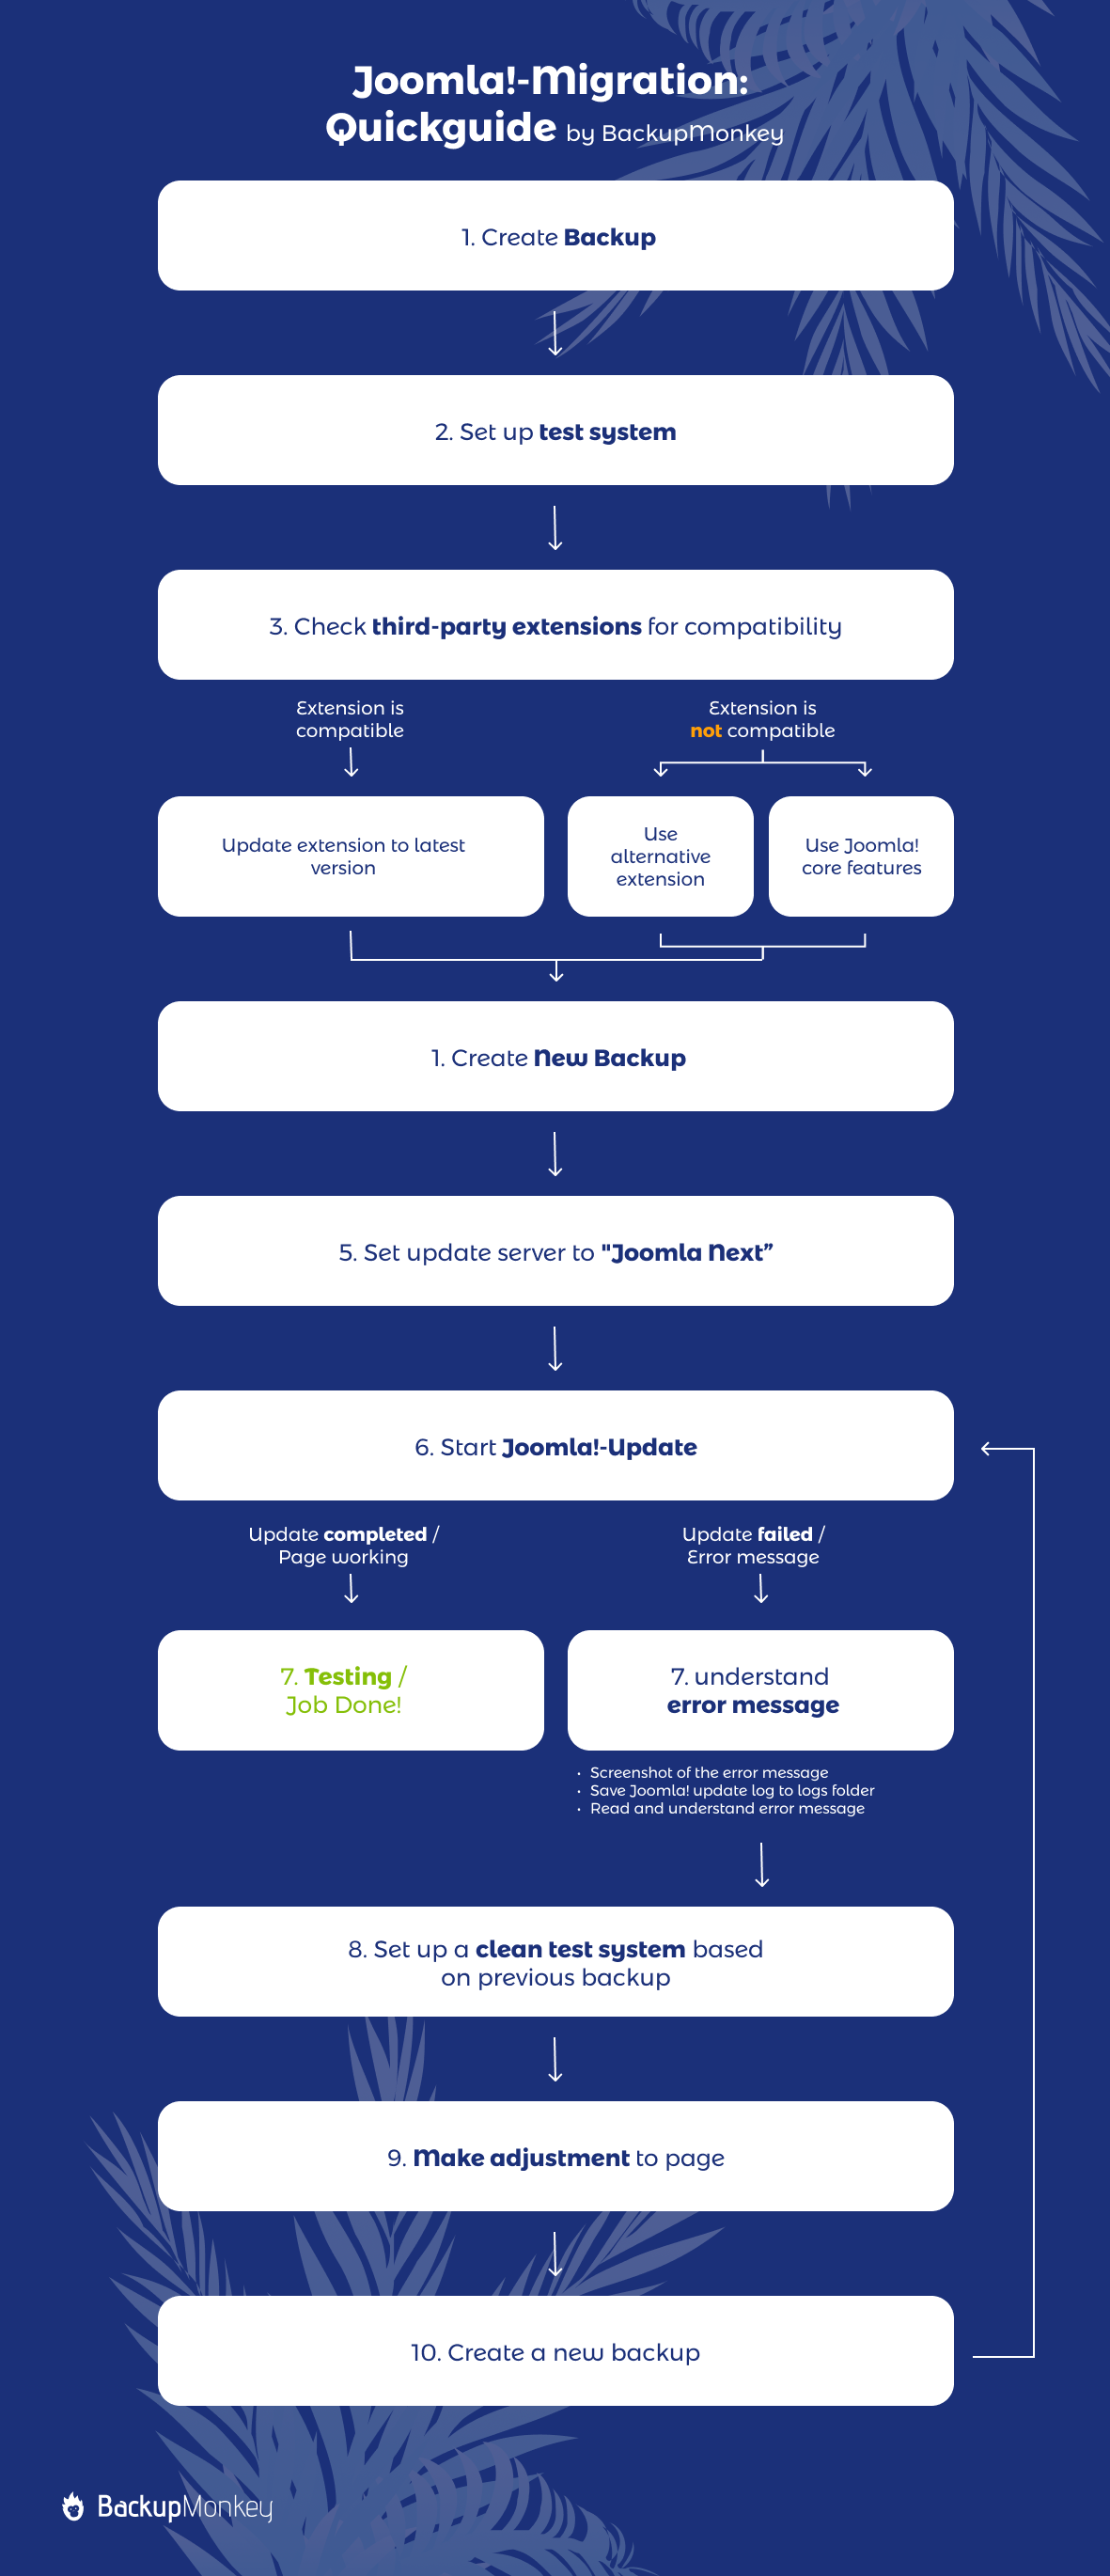
For those who want to skip the text, we have summarised the migration process as a diagram. Click here for our quickguide.
But slowly, let's take a look at the individual steps:
Step 1: No backup - no compassion!
As with all major changes to a Joomla instance, it is advisable to create a backup of the site in advance and store it externally. On the one hand, the backup serves as a fallback should something go wrong in the update process. On the other hand, an Akeeba backup archive allows us to easily transfer the website from one server environment to another and thus also makes our work easier and saves us valuable time.
Step 2: Set up a test system
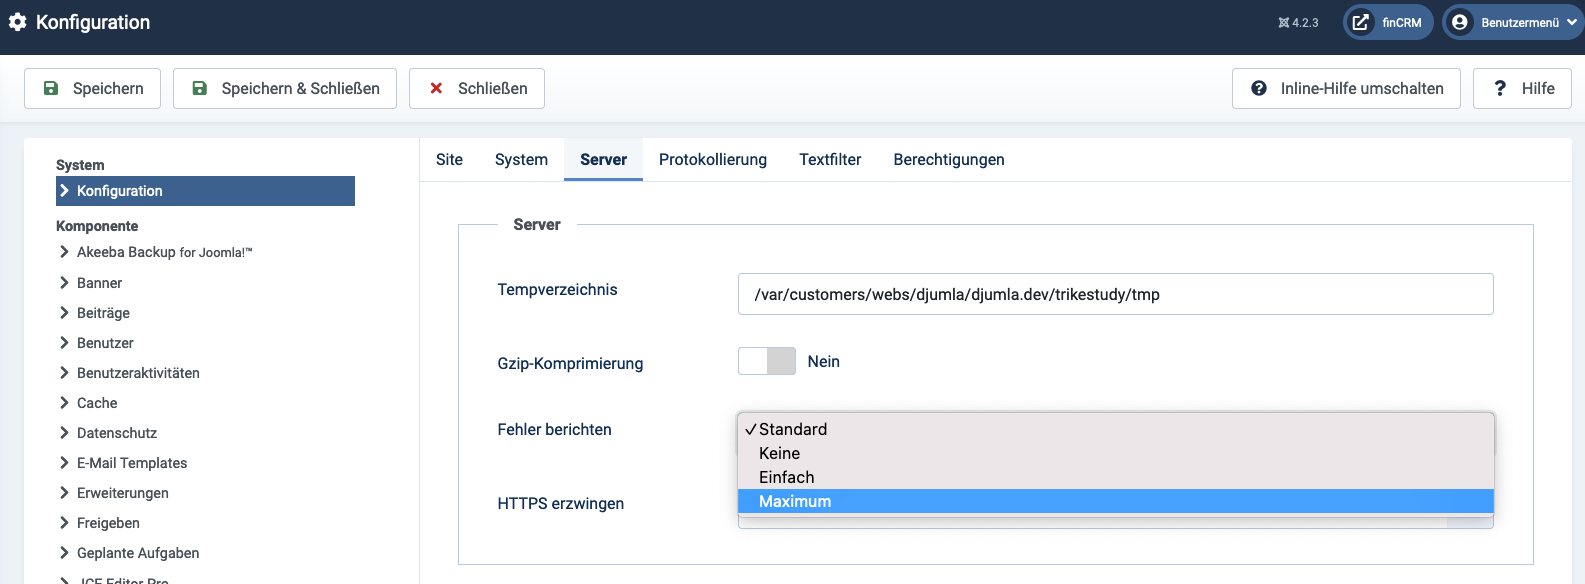
In the second step, it is advisable, as already described, to set up a test system on an external server. If possible, error reporting should be activated in the global Joomla! configuration and set to "maximum". We also recommend a generous memory limit (192+ MB) and a sufficient max-execution time (180+ seconds).
Step 3: Check extensions for compatibility and update them
After we have set up our test system, we can start with the actual update preparations in the next step. Since a pure migration of the core system would not be a problem and no incompatibilities arise at this point, we can first concentrate completely on any third-party extensions that are installed on the site.
The first step is to check whether all extensions used are compatible with the new major version. The following possibilities result from this check:
- The extension used is compatible: For us, this means that we can simply install the latest version and our job is done at this point.
- The extension used is not compatible: Now we are facing a problem because the existing contents cannot be transferred easily. In order to be able to update the page after all, we need an alternative solution. This solution can either be the use of an alternative extension with a similar or identical scope of functionalities. Alternatively (and in any case), it is important to check whether the functionality of the extension used cannot in the meantime simply be implemented using Joomla! core features. Reducing the number of third-party extensions used reduces migration efforts in the future and streamlines the Joomla installation in the long term.
In both cases, it is important to note that all data managed via incompatible extensions must of course be migrated. Whether this is done automatically or manually must be checked on a case-by-case basis.
Before the actual update, it is also important to deactivate all incompatible third-party extensions (especially plug-ins) so that they do not affect the update process.
Step 4: Update Joomla!
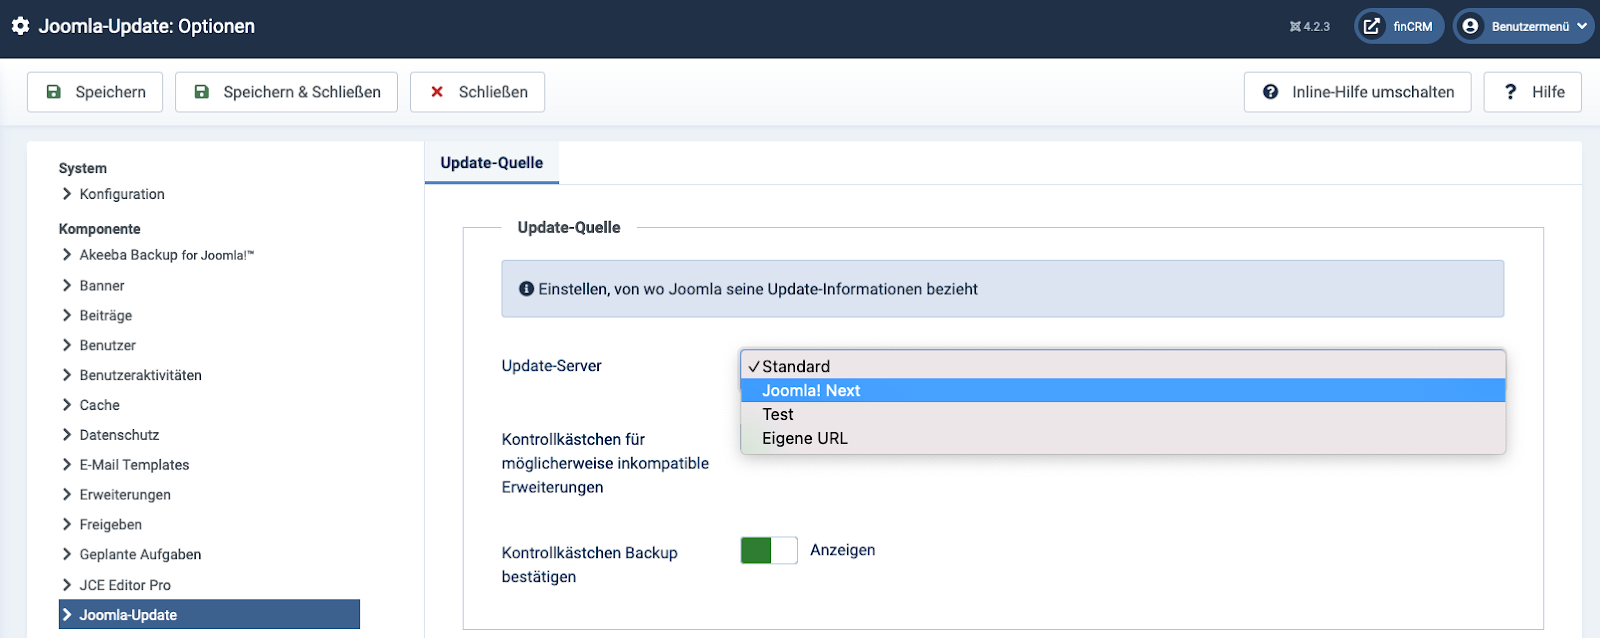
The preparations have been made so that we can start with the actual Joomla! update. To do this, we must first set the Joomla! update server to "Joomla Next". We can do this in the global configuration (see screenshot).
Afterwards, it is recommended to create another backup of the page. The reason for this is that we have a fallback in case the update fails. Without this update, all our previous adjustments to the site would be lost if it were irreparably broken during the update.
Once the backup has been made, the site can be upgraded to the next major version.
Ideally, this is the end of our work. The update passed without a problem and the website is still working properly. Unfortunately, however, not everything always runs as expected. Accordingly, we need solutions on how to proceed if the update fails. Basically, keep calm and very important: read error messages in detail and try to understand them. Since we have carried out the update on a test system and the live instance is still accessible, there is no reason to panic.
Here are our tips for dealing with error messages correctly:
- Make a screenshot of the error message
- Save Joomla! update log in the logs folder
- Read the error message and try to understand it
Once we have understood the error messages, the next step is to set up a new clean test system (for this we use the backup we made in advance) and to perform the necessary steps to avoid the errors in the next run. Once we have made the necessary changes, we create a new backup to save these steps for the future. We repeat these steps until the update can be carried out successfully.
Quickguide